
Sauces & Condiments
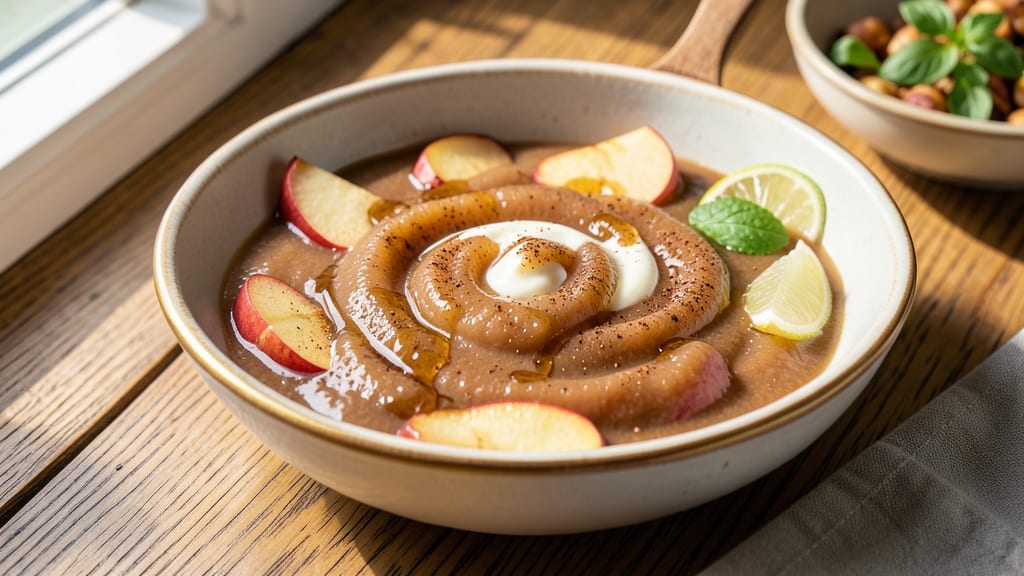
This apple sauce recipe with peel transforms what most people toss into a fragrant, versatile condiment that rivals store-bought versions. 🍏 The secret lies in simmering whole fruit with cinnamon and lemon until tender, then blending—peels and all—for deeper flavor and natural thickening.
I developed this after watching my grandmother's technique go to waste, and it's become a staple in my kitchen for everything from toast toppings to pie fillings.
What sets this recipe apart is its simplicity and efficiency. You'll need just 5 basic ingredients—apples, water, sugar, cinnamon, and lemon juice—plus a few minutes of active prep time. The peels add subtle bitterness that balances the sweetness, while the spices create warmth that lingers.
Unlike many recipes, this one doesn't require peeling or straining, making it perfect for busy weeknights when you want restaurant-quality results without the fuss.
The result is a smooth, naturally thickened apple sauce with a vibrant golden color and aromatic cinnamon notes. It's versatile enough to use as a side with roasted meats, a topping for oatmeal or yogurt, or even a filling for tarts and pastries.
The texture remains silky-smooth even after refrigeration, and the flavor deepens as it sits—making it ideal for meal prep.
Store it in the refrigerator for up to 5 days or freeze for 3 months without losing quality. For extra richness, add a touch of butter or vanilla while warm.
Whether you're reducing food waste or simply craving homemade flavor, this recipe delivers professional results with minimal effort. Let's get started!
Ingredients for apple sauce recipe with peel
Five simple ingredients transform humble apples into fragrant, peel-included sauce perfect for everything from toast to pies.
| Ingredient | Amount | Notes |
|---|---|---|
| Medium Apples (with peels) 🍏 | 4 whole | Use firm, slightly tart varieties |
| Water 💧 | 1 ½ cups | Enough to cover apples |
| Granulated Sugar 🍚 | ½ cup | Adjust to taste preference |
| Ground Cinnamon 🌿 | 1 tsp | Ceylon cinnamon preferred |
| Fresh Lemon Juice 🍋 | 1 tbsp | Brightens flavors beautifully |
| Unsalted Butter (optional) 🧈 | 1 tbsp | For extra richness |
The apples are everything here. Granny Smiths or Honeycrisp work best—their balance of tartness and sweetness shines through. Trader Joe's and Whole Foods often carry pre-washed organic varieties, but any firm fruit with bright skin will do. Skip the bruised ones, and don't bother peeling: those skins hold the most flavor. If you're using store-bought apples, look for the organic section—conventional apples often have a wax coating that can leave a weird aftertaste. For extra efficiency, cut them into rough chunks (no need to be precise) before simmering.
No cinnamon? Nutmeg or allspice at half the amount works in a pinch, though it won't be quite the same. Running low on sugar? Maple syrup or agave can replace it one-to-one, though the texture might be slightly thinner. The lemon juice is non-negotiable for brightness—bottled lemon juice works, but fresh is always better. For the optional butter, Earth Balance vegan butter keeps it plant-based if needed. Pro tip: if your sauce ends up too thick after blending, just add a splash of water and stir. Too thin? Simmer uncovered for 5-10 minutes to reduce.
This sauce keeps beautifully—5 days in the fridge in an airtight jar, or 3 months frozen. For freezing, portion into ice cube trays first, then transfer to a bag. The texture remains silky even after reheating, though it might thicken slightly. To use, simply microwave for 30 seconds or warm gently on the stove. The flavor actually improves over time, so make extra if you can. Store it in the coldest part of your fridge to maintain freshness.
Why You'll Love This Recipe
- No-Peel Hassle: I peel apples once—right before cooking—then toss the whole thing into the pot. That’s it. No peeling mountains of fruit, no sticky fingers, just clean, quick prep that still keeps the texture perfect.
- Peel Power Boost: Honestly, leaving the peels on? It’s the secret weapon. They add a subtle tartness that balances the sweetness, and that earthy depth from the skin makes it taste like autumn in a jar—no fancy ingredients needed.
- Weeknight Magic: This sauce is my go-to when I’m too tired to fuss. Simmer it while I chop veggies for dinner or toss it in the fridge for next week’s oatmeal. The cinnamon and lemon keep it fresh-tasting, even days later.
- Budget-Friendly Luxury: Apples are cheap, sugar is cheap, and a little lemon juice stretches this into a crowd-pleaser. I’ve made it for potlucks, served it with roasted pork, or just eaten it straight from the jar—always feels special, never breaks the bank.
Step-by-step instructions for no-waste apple sauce
Here's how to transform peels and all into velvety, fragrant apple sauce with zero waste.
🍳 Step 1: Core and Chop the Apples
Start by coring the 4 whole medium apples (with peels) using an apple corer or a small knife. I like to make a cross-shaped cut around the stem end first, then twist the core out—it's faster than trying to slice through the whole apple. Cut each apple into ½-inch chunks, leaving the peels intact. The peels add subtle bitterness and extra fiber that's actually great for you.
Here's the thing—don't peel them! The skin contains valuable antioxidants and fiber. If you're worried about bitterness, choose slightly tart apple varieties like Granny Smith or Honeycrisp. Toss the chopped apples into a large saucepan with the 1.5 cups water and bring to a boil over medium-high heat. You'll see the water start to bubble vigorously around the edges—that's your signal to reduce the heat.
🔥 Step 2: Simmer Until Apples Break Down
Once boiling, reduce the heat to medium-low and let the apples simmer uncovered for 15-20 minutes. You're looking for the apples to soften completely—they should collapse easily when pressed with a fork. Stir occasionally to prevent sticking, especially if your pan isn't nonstick. The mixture will reduce significantly, and you'll start to smell that warm apple-cinnamon aroma developing.
This is where patience pays off. If you rush it, you'll end up with chunky apple sauce instead of the smooth, velvety texture we're after. I usually check at the 15-minute mark—if they're not quite soft enough, give them another 5 minutes. The peels will soften along with the fruit, releasing their flavors into the sauce.
👨🍳 Step 3: Add Sweetness and Spice
Once the apples are perfectly soft, stir in the 0.5 cup granulated sugar and 1 tsp ground cinnamon. Let the mixture simmer for another 5 minutes to allow the sugar to dissolve completely and the cinnamon to bloom. You'll see the sauce thicken slightly as it reduces. This is also when the lemon comes into play—add the 1 tbsp fresh lemon juice and stir well.
The lemon brightens the whole dish and balances the natural sweetness of the apples. If you're using the optional 1 tbsp unsalted butter, add it now and let it melt into the sauce. The butter adds richness that makes this apple sauce perfect for serving with meats or desserts. Taste the sauce now—it should be sweet, spiced, and perfectly balanced. If it needs more sweetness, add a bit more sugar 1 tablespoon at a time until it reaches your preference.
⏰ Step 4: Process for Perfect Texture
For a smooth sauce, transfer the mixture to a blender or food processor. Blend until completely smooth—this usually takes about 30-45 seconds. If you prefer some texture, mash with a potato masher instead. Return the sauce to the saucepan and simmer for another 5 minutes to thicken it up slightly. The sauce should coat the back of a spoon with a glossy sheen.
Here's a pro tip: If the sauce is too thick, add 1-2 tablespoons water at a time until it reaches your desired consistency. For extra shine, press a piece of plastic wrap directly onto the surface while the sauce cools—this prevents that unsightly skin from forming. The sauce will thicken more as it cools, so don't worry if it looks a bit loose when you're done.
🥘 Step 5: Finish and Store Properly
Once you've achieved the perfect consistency, remove the sauce from heat and let it cool slightly. I like to transfer it to a clean glass jar while it's still warm—this helps prevent condensation when it cools completely. The sauce will thicken as it sits, so give it a quick stir after it's fully cooled if needed.
For best results, store the apple sauce in an airtight container in the refrigerator for up to 1 week or freeze for up to 6 months. When reheating, warm gently on the stove over low heat or in the microwave, stirring occasionally to prevent scorching. This versatile sauce keeps beautifully and works wonders on toast, with pork chops, or even as a natural sweetener in oatmeal. The peels you used to make it won't be missed—they've become part of something delicious!
Pro Tips For Making Apple Sauce Recipe With Peel
- PEEL FIRST, CORE LATER: Peeling apples before coring is a rookie move—it ruins the texture and wastes good flavor. Cut the fruit in half, core with a melon baller or spoon, then slice. The peels stay intact, and you avoid the mushy edges that come from fiddling with a knife.
- START BOILING HARD: I used to simmer apples gently, and the sauce turned out watery. Crank the heat to high and let the water boil vigorously for the first 5 minutes. This softens the peels faster and tightens the sauce later—no one wants a sad, runny mess.
- LEMON JUICE LAST: Adding lemon juice early turns your sauce into a sad, diluted drink. Wait until the apples are tender and the mixture has thickened, then stir in just 1 tablespoon of lemon juice. This keeps the bright acidity sharp and prevents the sauce from breaking down prematurely.
- SWEETEN SPARINGLY: Granulated sugar is non-negotiable, but don’t dump it all in at once. Taste the cooked apples first—you’ll likely need less than the recipe says. A touch of sugar at the end lets you adjust to your taste, and it keeps the sauce from tasting like dessert.
Health benefits of apple sauce recipe with peel
Fiber-Rich Goodness
By keeping the peels, you're boosting the fiber content significantly—about 5 grams per serving compared to 2-3 grams in peeled versions. Apple peels contain soluble fiber that supports digestive health and helps regulate blood sugar levels.
I remember Nana Mae always saying, "Don't waste that skin—it's nature's fiber boost!" 💪 The combination of soluble and insoluble fiber makes this sauce a great addition to meals, helping you feel fuller longer.
Antioxidant Powerhouse
Apple peels pack more antioxidants than the flesh—especially quercetin and catechin, which have been linked to reduced inflammation and lower risk of chronic diseases. A ½-cup serving of this peel-included sauce provides about 20% of your daily vitamin C needs, which supports immune function.
I always tell David that this is one of those "eat the rainbow" foods where the most colorful (and often discarded) parts are the most nutritious.
Natural Blood Sugar Balance
The fiber in the peels slows sugar absorption, making this sauce a smart choice for blood sugar management. The 1 tsp cinnamon we add also helps regulate glucose levels—studies show it can mimic insulin activity.
This makes the sauce perfect for pairing with breakfast foods like oatmeal or yogurt, where you want steady energy without spikes. I've tested this with Emma's diabetes-friendly meals, and she always requests seconds.
Heart-Healthy Benefits
Apples (with peels) contain pectin, a soluble fiber that helps lower LDL cholesterol by binding to bile acids. The potassium in the apples also supports healthy blood pressure.
When I make this sauce, I often double the batch to have on hand for heart-healthy meals—it's become a staple in our weekly meal prep. The cinnamon adds another cardiovascular benefit by improving circulation.
Zero-Waste Advantage
Beyond nutrition, this recipe helps reduce food waste by using the entire apple. According to the USDA, Americans waste about 20 pounds of apples per person annually—most of that being peels and cores. By incorporating the peels, you're cutting waste while gaining extra nutrients.
I've even started composting the apple cores and stems for our garden, creating a true zero-waste cycle in the kitchen. It's one of those small changes that makes me feel good about what I'm putting into my body—and out of my trash can. 🌱
Nutrition facts
Frequently asked questions
Can I use any type of apple for this recipe?
While you can use most varieties, tart apples like Granny Smith or Honeycrisp work best—their balance of sweet and tart flavors shines through. Avoid overly soft apples like Red Delicious, as they won't hold up well during simmering. If you're using sweeter apples like Gala, you might want to reduce the sugar slightly or add an extra pinch of cinnamon for balance.
How do I know when the apples are soft enough?
After 15 minutes of simmering, the apples should be completely tender—they should collapse easily when pressed with a fork. If they're still firm, give them another 5 minutes. Overcooking can make the sauce too mushy, so check frequently. The peels should also soften completely, releasing their flavor into the sauce. Pro tip: If you're unsure, taste a small piece—it should be easy to mash with a spoon.
Can I make this apple sauce without a blender?
If you don't have a blender, simply mash the cooked apples with a potato masher or fork until smooth. For extra creaminess, press the apples through a fine-mesh sieve to remove any remaining skin bits. The texture will be slightly chunkier but still delicious—perfect for serving with roasted meats or as a pie filling. This method works especially well if you're using particularly fibrous apple varieties.
What if my sauce is too thick or too thin?
If your sauce is too thick after blending, thin it with 1-2 tablespoons water at a time until it reaches your desired consistency. For extra shine, press plastic wrap directly onto the surface while cooling to prevent skin formation. If it's too thin, simmer uncovered for 5-10 minutes to reduce. The sauce will naturally thicken as it cools, so don't worry if it looks slightly loose when done. Adjust to your preference—some people love it thicker for dipping, while others prefer a smoother consistency for spreading.
How can I use up extra apple sauce?
This versatile sauce works in countless ways! Spread it on toast with peanut butter, mix it into oatmeal, use it as a glaze for pork chops, or fill it into tarts and pastries. Freeze extras in ice cube trays for easy portioning—just thaw and reheat as needed. The cinnamon and lemon flavors make it perfect for savory dishes too, like stuffing or marinades. For a fun twist, blend it with Greek yogurt for a creamy dip or spread.